Setup an OpenVPN server on a QNAP NAS
A Virtual Private Network, also known as a VPN allows you to connect to your home or business network remotely without having to be at home or work.
If you've ever wanted to access Documents from your NAS at home while you're on a vacation at the other side of the world, you can use a VPN to access those documents just as if you were at home.
For this tutorial, you will need both a QNAP NAS and access to your router's configuration interface.
Firstly, login to the web console of your NAS. Once you are logged in you will want to open the App Center and install an app called 'QVPN Service'.
After the QVPN service app has been successfully installed, open the QVPN Service app. It should look like this:
Click on the left menu option 'OpenVPN'. You should now see a few settings. I'll explain each of these settings one by one.
- VPN Client IP Pool: This will be the range in which the VPN clients connect in. Unless you know what you're doing, you shouldn't need to do anything here.
- VPN Server Port: This is the port that your VPN server comes from. Again, you don't really need to change this.
- Maximum number of clients: By default, this is set to five clients. This number is the maximum amount of clients that can connect to your VPN server at once.
- Encryption: This is the level of encryption that is used when you are using your VPN.
- Network Interface: By default, this is set to Autodetect, which is good but if you have both an Ethernet and Wireless connection to the network, you should choose the one with the best connection (usually Ethernet 1).
- Redirect Gateway: This means that when you VPN into your network, the VPN Server will act as a Gateway server.
- DNS: DNS stands for Domain Name Servers. This option lets you choose what DNS server that your clients should use. You can set it to be the same DNS server that is set for your NAS or a custom one like OpenDNS or Google DNS.
After you've saved your configuration you will need to download the OpenVPN file. This file will be used for setting up the OpenVPN clients.
Now you will want to login to your Router's web interface. You will want to find the part where you can configure Port Forwarding. You will need to forward the 1194 port to the IP Address of your NAS. The way of doing this is different on each router, so I would look it up online for a tutorial on Port Forwarding.
Now that you have opened all of the required ports on your network, you can connect to it from various devices. For now, I'll do a tutorial of connecting to your VPN from a Windows computer and an Android smartphone.
Connect from Windows
If you're connecting from Windows, you'll need to download the Windows client for OpenVPN. This can be downloaded from the OpenVPN website.
Once it's installed. Open the Client program and right click on it's tray icon (also known as notification icon) and click 'Import file'. You will now want to select the file you downloaded earlier from the QNAP Web Console.
Now you should be able to right click on the OpenVPN tray icon and click 'Connect'. As long as everything's configured alright it should work and allow you to access your home network from afar.
Connect from Android
A similar sort of process applies for Android.
First, download the OpenVPN Connect app from the Play Store. After it's downloaded, open it. You should be presented with a screen like this.
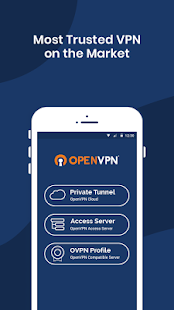
Select the bottom option, OVPN Profile. Now you can locate the file you downloaded earlier from the QNAP Web Console.
All that you should need to do now is to flick the switch on the VPN connection and you should be good to go.